| User Guide |
| Version 1.0 |
| The Main Menu | |
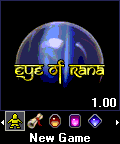
The Main Menu allows you to choose the following options: New GameStart a new game. If a current game already exists, you will be asked if you want to quit that game and start a new one. If you choose to start a new game, you will proceed to character generation (see "Creating a Character", below). Continue GameIf a current saved game exists, you can load and play that game. InstructionsLearn how to play Eye of RanaTM. OptionsLets you change options for Eye of RanaTM. Hall of FameShows scores for previous games. CreditsSee who created Eye of RanaTM. |
| Creating a Character | |||||||||||||||||||||||||||||||||||||||||||||||||||||||||||||||||||
|
The Character Generation function is available from the Main Menu by selecting the [New Game] menu item.
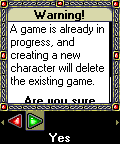
NOTE: The application only allows a single game to be saved to the device file system. If the player has started the process of creating a new character, and a save game file already exists in the application directory, the he is warned that the process will overwrite the existing game. The player must select [Yes] from the Overwrite menu to proceed with the creation of a new character. Selecting the [No] menu item or pressing the [CLR] key will return the player to the Main Manu. The character generation process is a multi-step procedure that will allow the player to determine his character's starting attributes and equipment, character sprite, and name. Each step is preceded by a dialog containing information for the player, including the advice on creating a powerful character. If the device screen is not large enough to display all of the help text, the player may use the [Up] and [Down] keys on the navigation key pad to scroll the text. Pressing the [SELECT] key will close the dialog and continue to the next step of character creation. At any time, the player may press the [CLR] key to return to the previous menu or dialog.
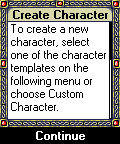
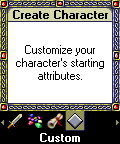
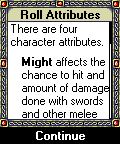
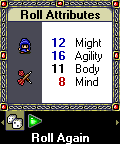
Step 1 Generation Method: The player must choose a method of generation. Choosing one of the three character templates is the fastest method, as each automatically starts the new character with a well-balanced assortment of attributes and equipment. The custom method allows the player to randomly roll the character's starting attributes until acceptable results have been generated. While slightly more time-consuming, this method has the potential to allow for the creation of more powerful characters. To select a method, the player must select one of the four menu items on the Method menu, and then press the [SELECT] key. If a character template is selected, step 2 of the character generation process is skipped. Step 2 Attributes: If the player chose to create a character using the custom method, he must roll random attribute values until satisfied with the results. Each random roll will generate four numbers, each in the range of 3 to 18. A value of 10 or 11 is considered average. Values that are considered above-average are colored blue, whereas below-average results are colored red. To roll another set of attribute values, the player must select the [Roll Again] menu item, and then press the [SELECT] key. There are no limits to the number of times the attributes can be rolled. Once acceptable values have been generated, the player must select the [Accept Roll] menu item, and then press the [SELECT] key to proceed to the next step.
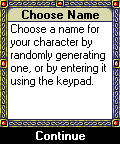
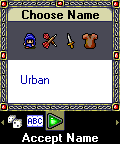
Step 3 Character Name: Every character needs a name. The player may manually enter a name using the device key pad, or he may randomly retrieve one from a pre-defined list of names. There are three lists of 40 unique names, one for each character type (template). If the player chose to create a custom character, the character's attributes will be used to determine which name list to use. To roll for a random name, the player must select the [Random Name] menu item, and then press the [SELECT] key. There are no limits to the number of times a name can be retrieved. Because the result is entirely random, it is quite possible for the same name to be retrieved on two consecutive rolls. The player can enter a name manually by selecting the [Edit Name] menu item, and then pressing the [SELECT] key. The rectangular box surrounds the name when in text editing mode and the text cursor will be visible at the end of the name. Using the keypad, the player can enter upper and lower-case alpha characters and limited symbols. See elsewhere in this document for details on Text Entry and the allowable characters. When finished editing, the player must press the [SELECT] key to return to the Name menu. Once the player is satisfied with the character's name, he must select the [Accept Name] menu item and press the [SELECT] key to continue.
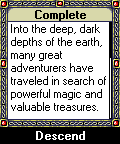
Final Step Character Complete: The character is finished. Once the player is ready to begin the game, he will proceed into the dungeon. It is important to note that the only time a character is saved is during the normal save during application (or Game Mode) exit. In the event of device power loss, the new character may be lost. If the device is prone to power loss or the battery is low, it is wise to save the game often (be exiting Game Mode). The player must press the [SELECT] key to descend into the dungeon.
| |||||||||||||||||||||||||||||||||||||||||||||||||||||||||||||||||||
| Game Mode |
|
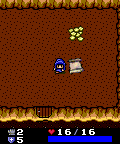
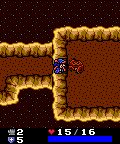
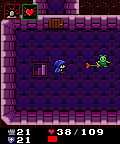
Before this point, all areas of the application were used to provide the player with information on the game, the ability to set game options, and to create a character, but once the player enters the dungeon, the real game begins. Game Mode refers to the state of the game where the player can see his or her character (PC for "player character") rendered at the center of the screen, while game events are processed in real-time; monsters may move around on screen, special effect animations will play, and other events may occur with or without any player interaction. It is during Game Mode that the player is able to move his character around the dungeon, pick up treasure and magic items, and engage opponents in combat. Accessing any other mode, such as the Character Profile, Mini-Map, or any of the inventory management menus, will pause the real-time action until the player returns to Game Mode. |
| Exploring the Dungeon | ||||||||||||
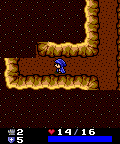
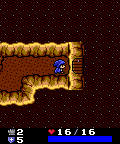
The player must use the navigation key pad to move the PC through the dungeon, exploring each room for valuable magic items and treasure. When the PC enters the dungeon for the first time or descends to a new dungeon level, he is placed in a room unoccupied by monsters. Generally, if there are no monsters in the room with the PC, and there were no monsters previously chasing him, he should be safe to examine the area. When an item is found lying on the ground, the PC can pick the item up and add it to his inventory simply by walking over it. When an item is added to the PC's inventory, a short description of the item is displayed on the status bar, but only for a limited time. Various pieces of dιcor may be scattered around each room, and some may initially be mistaken for items that can be picked up. After playing the game for a while, you will find it quite easy to differentiate valuable items from the background rubble and scattered debris. When navigating corridors for the first time, only those portions of the corridor that are in a direct line-of-sight of the PC are made visible. To see what is around the corner, the PC must approach the corner and look. Doors block the PC's line-of-sight, so when approaching a room for the first time, use caution when walking through the door. A nasty monster could be on the other side, just waiting to attack. The moment the PC walks through the door, whatever lies on the other side will be revealed. |
| Combat with Monsters | ||||||||||||
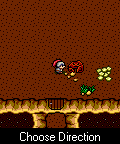
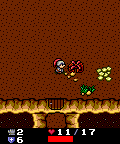
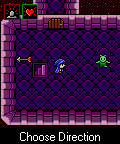
Combat is an integral part of the game, and the only means by which the player's character can gain experience. While in Game Mode, the player can initiate an attack by pressing the [SELECT] key. A text prompt will appear on the status bar asking for the intended direction of the attack. The player must use the navigation key pad to enter the desired direction. If so desired, the attack order can be canceled by pressing the [SELECT] button a second time, or by pressing the [CLR] key. The real-time action of Game Mode is paused when the attack direction prompt is on screen, so there is no need to quickly press the direction key. The action is resumed the moment a direction is entered or the attack is canceled. The second screenshot in each set above shows the PC's Action Bar in the process of recharging. When the Action Bar is blue, it is fully recharged and ready for another attack. The bar is red while it is recharging. COMBAT TIP: Always pay close attention to the Status Bar and the PC's Current Health. If the value ever reaches zero, the PC will die. Most monsters in the game are aggressive, although there are a few that are not initially hostile, such as the Bat. The passive creatures will wander around the level, ignoring the player until attacked, but the aggressive monsters will charge the PC the moment they spot him. For this reason, it is important for the player to stay aware of the PC's surroundings. Many rooms are large, and an aggressive monster might already be heading towards the PC even though a first glance at the room would indicate it to be empty. The player's distance to a monster can be an important factor in determining the best way to initiate combat. Any character that uses a melee weapon, such as a sword, will need to approach the monster and stand adjacent to it. Melee weapon have a limited range, and an attack will automatically miss if the target monster is too far away. Missile weapons and wands can be used effectively from a great distance. When initiating combat with a non-hostile monster, the player would be wise to position his character the furthest possible distance away from the target so that by the time the creature reaches the PC, he will have been able to fire a number of attacks against the monster. COMBAT TIP: Regardless of the type of weapon the PC is using, some monsters don't move very quickly, and if the player times it right, he can continually move the PC away from the monster, stopping only long enough to issue an attack. This is more difficult with melee weapons, but still quite possible. |
| Using Potions and Scrolls | ||||||||||||
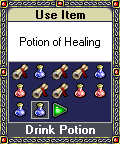
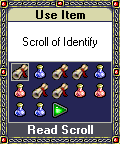
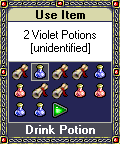
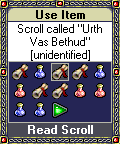
The Use Item menu can be accessed by pressing the [7] key while in Game Mode. An inventory menu containing all usable potions and scrolls will appear, allowing the player to choose the item to be used. To use an item, the player must use the navigation key pad to select the desired item in the menu, and then press the [SELECT] key. Pressing the [CLR] key at any time will return the player to Game Mode. In the first pair of example screenshots below, the current menu selections are on items that have already been identified, and the item types are displayed in the white box above the menu. In the second pair of screenshots, the menu selections are on items that are marked as unidentified. The only information provided to the player is a generic description of each item. Unidentified potions are distinguishable by the potion's color, whereas unidentified scrolls have arcane and otherwise meaningless names. At the start of each new game, the potion colors and scroll names are randomized, so that if in one game a Blue Potion is identified as a Potion of Might, it may be something entirely different in another game. It is important to note that until an individual item has been identified, the player will have no way of knowing its true nature and capabilities. Potions and scrolls may stack, so if more than one item of a particular type is carried, there will be only a single entry for that type in the menu. An example of this behavior can be seen in the third screenshot below; the description of the selected menu item is "2 Violet Potions [unidentified]". |
| Equipping Armor, Weapons, and Rings | |||||||||
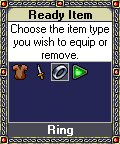
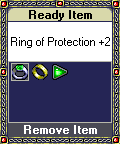
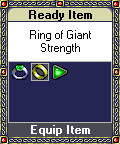
The Equip Item menu can be accessed by pressing the [8] key while in Game Mode. A menu will appear allowing the player to choose the type of item to equip: Armor, Weapon, or Ring. The player must use the navigation key pad to select the desired item type, and then press the [SELECT] key to access the appropriate Equip Item submenu: Equip Armor, Equip Weapon, or Equip Ring. The [CLR] key can be used to return to a previous menu or to return to Game Mode. The Equip Ring submenu contains all rings in the PC's inventory. Rings that are currently equipped will appear first in the menu followed by all remaining rings carried. The sample screenshots on the right cover the procedure used to equip a ring. As seen in the second screenshot above, the Ring of Protection +2 is already worn, and the menu selection text just below the menu correctly says, "Remove Item". The second ring in the menu, the Ring of Giant Strength, is not worn. If the player selects an item that is currently being worn, the item will be removed under normal circumstances. If the item is cursed, it will remain in use, and the player will be informed of the situation.
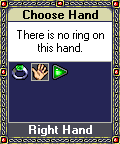
When a selected item is not currently being worn, under normal circumstances, the item will be equipped in the appropriate manner, replacing an equipped item if necessary. Special cases are handled appropriately depending on the situation, for example, the player will be notified if a cursed item of the same category type is already being worn and cannot be replaced with the selected item, or if the selected item is known to be cursed, the player is prompted to confirm his intention to equip the cursed item. In the case of equipping rings, an additional submenu, the Choose Hand menu, is used to determine which hand the player would like to place the ring on. The PC may wear two rings at the same time, one on each hand. Rings may stack if more than one of the same type is carried. Unidentified rings can be differentiated by the type of stone or precious metal; Silver Ring, and Emerald Ring are two possible descriptions. |
| Identifying Items | ||||||||
|
The abilities of most magical and cursed items in the game are initially unknown to the player. When a new magic scroll is found, the only way it can be differentiated from other scrolls is by its name, often nothing more than an arcane series of words. Unidentified potions can be organized by color, but the specific purpose of each is not known until the item has been identified.
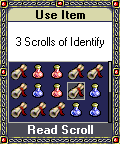
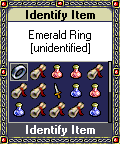
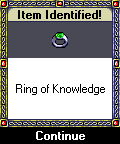
Fortunately, for the player, there are two means by which an items true nature can be determined. The first and highly preferred method is by using a magic Scroll of Identify. Like the Potion of Healing, it is one of the few magic items in the game that is automatically known from the start. Because of this, it is easily recognized when found. The process of using a Scroll of Identify is the same as any other magic scroll or potion, but once used, a secondary menu will appear allowing the player to select the item from his inventory that he would like identified. The Identify Item menu may contain any sort of item with unknown properties, including weapons, armor, potions, scrolls, and rings. The player must use the navigation key pad to select the desired item, and then press the [SELECT] key to identify it. Pressing [CLR] or selecting the [Done] menu item will return the player to the Use Item menu without consuming the Scroll of Identify. If an unidentified item was selected from the Identify Item menu, it will automatically be identified and the Item Identified dialog will appear informing the player of the items true nature. The Scroll of Identify used to reveal this information will be consumed and removed from the PC's inventory. As mentioned earlier, there are two methods of identifying unknown items. The second is rather risky, but in the event that there are no Scrolls of Identify available, it may be an acceptable option. Any unknown item can be identified simply by using or equipping the item. While there are many magical items in the game, a great number of them are cursed, and when a cursed item is equipped, it cannot easily be removed. Caution should be used when attempting to identify equipment (weapons, armor and rings) by experimentation. Cursed potions and scrolls can be dangerous, but the effects usually have a limited duration. |
| Handling Cursed Armor, Weapons, and Rings | |||||
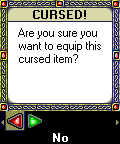
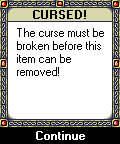
While attempting to equip or remove items, one of the two dialogs to the right may appear. The Confirm Cursed menu is used to verify that the player wishes to equip and item that is known to be cursed. In most cases, the menu will be reached by accident, but the player is able to equip the item if he so desires. The player should select [No] if he does not wish to equip the cursed item, or [Yes] if he intends to. The Item Cursed dialog will appear when the player attempts to remove a cursed item, or when he attempts to equip a different item that would otherwise replace the cursed one. When this dialog appears, the player must press [SELECT] or [CLR] to return to Game Mode. The only way a cursed item can be removed is by using a Scroll or Remove Curse beforehand, or if the item is an armor or weapon, by using enough Scrolls of Enchant Armor (or Weapon) to remove the negative magic modifier on the item. A cursed Dagger -2 would require two Scrolls of Enchant Weapon, one for each negative point. |
| Dropping Items | |||||
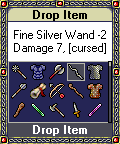
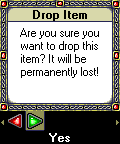
While there are no limits on the size of the PC's inventory or on the number of items carried, the player has the option of dropping items that are no longer needed. The Drop Item menu can be accessed by pressing the [9] key while in Game Mode. An inventory menu will appear, containing all items carried by the PC, excluding only those that are currently equipped. To drop an item, the player must use the navigation key pad to select the unwanted item in the menu, and then press the [SELECT] key. Before the item is dropped from the PC's inventory, a second menu will appear, requesting confirmation from the player. The item will be removed from the PC's inventory and destroyed when [Yes] is selected. Unlike the other inventory management menus, after an item has been dropped, control returns to the Drop Item menu, allowing the player to drop additional items if necessary. The [CLR] key can be used to return to a previous menu or to return to Game Mode. |
| The Character Profile | ||||||||||
|
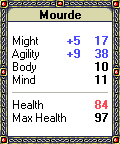
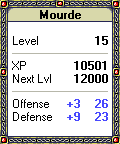
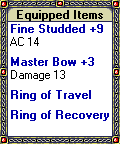
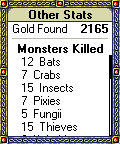
The Character Profile pages can be accessed by pressing the [STAR] [*] key while in Game Mode. The character profile consists of four pages of information pertaining to the PC. The player can navigate to other pages by pressing [STAR] or [SELECT]; each key press will move to the next page. Pressing [CLR] will return to the previous page or Game Mode if there are no pages to return to.
The first page shows the PC's attributes (Might, Agility, Body and Mind), as well as his Current and Maximum Health values. Attributes If an attribute has been affected by magic, an adjustment rating will be located to the left of the base value. Both the attribute and adjustment rating will be colored blue if the adjustment is positive, and red if it is negative. Health This represents the PC's Current Health. If the value is less than the PC's Maximum Health value, it will be colored read to show the injured state of the character. Maximum Health If the Maximum Health value has been affected by magic, its color will reflect the magic effect; blue for a positive effect, and red for negative. The second page of the Character Profile shows the PC's Level, current Experience, experience needed for the Next Level, and his Offense and Defense ratings. Level The PC's level influences the pacing of the game. As the level advances, more powerful monsters, weapons, and armor will be introduced. XP An abbreviation for "Experience". This value reflects the total amount of combat experience received by defeating monsters. Next Lvl An abbreviation for "Next Level". This value represents the amount of experience needed to advance to the next level. If the PC's XP and Next Lvl values are respectively 85 and 100, another 15 is needed before the character will advance to the next level. Offense The Offense rating represents the PC's overall ability to attack opponents. As the game progresses, monsters become increasingly more powerful, so the player should always seek to increase the PC's rating by finding more powerful equipment and by raising the attribute used by the PC's weapon of choice (melee weapons use Might; missile weapons use Agility; and wands use Mind). Defense The Defense rating represents the PC's overall ability to defend against attacks. When a monster attacks the PC, the value of its attack roll must exceed the PC's Defense rating. Because of this, the player should always seek to increase this rating whenever possible. Armor is the largest factor, although the Agility attribute is also an influence.
The third page shows the items currently equipped by the PC. There are four equipment "slots" that may be used by the player: armor, weapon, and the right and left hand rings. If a particular slot is empty, nothing will be listed. Each item's name will be blue if the item is magical, and red if it is cursed. If the screen is not large enough to hold all the text, a scrollbar will appear, and the player may use the [UP] and [DOWN] keys on the navigation key pad to scroll the text in the respective direction. The fourth and final page of the Character Profile is used to list the total amount of gold and gems found so far, as well as a tally of the monsters defeated. The section "Monsters Killed" will only appear after the first monster has been defeated. If device screen is not large enough to display the entire list, a scroll bar will appear, and the player may use the [UP] and [DOWN] keys on the navigation key pad to scroll the text in the respective direction. |
| Descending Stairs |
|
After the stairs to the next level have been located, the PC can use them at any time. The stairs are a one way portal to the next level, and once the PC has descended, there is no way to return to the previous level. The stairs can be used by pressing the [0] key while in Game Mode. |
| The Mini-Map | |
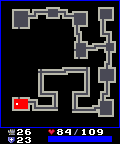
With all the twisting corridors, each dungeon level has the potential to be somewhat confusing, but the Mini-Map can be used by the player should he ever feel lost. The Mini-Map is a highly simplified version of the current dungeon level that shows only the areas that have already been explored by the PC. The Mini-Map can be accessed by pressing the [POUND] [#] key while in Game Mode. If the device screen is not large enough to display the entire map, the player may use the navigation key pad to scroll the map in the desired direction. Pressing the [SELECT] or [CLR] key will return the player to Game Mode. When drawn, the Mini-Map will highlight the PC's current position by coloring the room, corridor, or hub red. If the stairs to the next level have already been found, their location will be marked by a white dot. |
| Saving and Resuming the Game |
|
The game can be saved by pressing [CLR] while in Game Mode. All necessary data will be saved to the device storage system for later retrieval. To resume a saved game, select the [Continue] menu item from the Main Menu. While reading or writing data, a white text overlay appears on the screen request the player to wait. This overlay will disappear automatically when the data transfer has completed. |
| Winning the Game |
|
While the game can be enjoyed for hours by just exploring, improving the PC's attributes, and besting opponents in combat, the primary goal for the player is to locate and retrieve the fabled Eye of Rana, a magical orb of immense power. The artifact, guarded by daemons and devils of the underworld, rests deep within the dungeon, and the PC must advance to 20th-level before he is able to reach it. When the PC has picked up the Eye of Rana and holds it in his possession, he will have won the game. |
| Appendix A: Monsters | |||||||||||||||||||||||||||||||||||||||||||||||||||||||||||||||||||||||||||||||||||||||||||||||||||||||||||||||||||||||||||||||||||||||||||||||||||||||||||||||||||||||||||||||||||||||||||||||||||||||||||||||||||||||||||||||||||||||||||||||||||||||||||||||||||||||||||||||||||||||||||||||||||||||||||||||||||||||||||||||||||||||||||||||||||||||||||||||||||||||||||||||||||||||||||||||||||||||||||||
|
There are 31 types of monsters in the game, and each has a set of attributes that defines its behavior and power as described below.
Bitmap - This bitmap represents the monster in game, and may contain 2-4 frames of animation. Name - This text string is used when listing the monsters killed on the character profile. Level - This determines when the monster will be introduced to the PC. When a new dungeon level is generated, rooms are populated with monsters of equal or lower level to the PC. Value - This is the amount of experience the PC will receive when the monster is killed. Health - This is the amount of health the monster has when the level is generated. All monsters or a particular type start with the same amount of health. Defense Rating - Used to resist attacks from the PC. If the PC's attack roll is greater than the monster's Defense Rating, the attack succeeds, otherwise it fails. Offense Rating - Used in combination with the random attack roll to strike the player. If the sum of the monster's Offense Rating and a random roll (2-20) is greater than the PC's Defense Rating, the attack succeeds, otherwise it fails. Damage Range - The amount of damage the player receives if an attack made by the monster succeeds. Attack Delay - An approximate delay (in milliseconds) between monster attacks. Move Speed - The number of pixels the monster can move per tick. Special Flags - Miscellaneous flags that define non-standard characteristics. | |||||||||||||||||||||||||||||||||||||||||||||||||||||||||||||||||||||||||||||||||||||||||||||||||||||||||||||||||||||||||||||||||||||||||||||||||||||||||||||||||||||||||||||||||||||||||||||||||||||||||||||||||||||||||||||||||||||||||||||||||||||||||||||||||||||||||||||||||||||||||||||||||||||||||||||||||||||||||||||||||||||||||||||||||||||||||||||||||||||||||||||||||||||||||||||||||||||||||||||
| Appendix B: Armor and Weapons | ||||||||||||||||||||||||||||||||||||||||||||||||||||||||||||||||||||||||||||||||||||||||||||||||||||||||||||||||||||||||||||||||||||||||||||||||||||||||||||||||||||||||||||||||||||||||||||||||||||||||||||||||||||||||
|
There are two types of items that can be equipped by the player; armor and weapons. Only one of each type can be equipped at a time, although any combination is allowed without penalty. When equipped, armor increases the PC's Defense Rating, whereas weapons increase the Offense Rating. The amount of the increase is equal to the item's Base Rating modified by its Craftsmanship and Magic Rating. The modified rating cannot fall below 1. An item's Magic Rating determines whether or not that item is considered magical or cursed. If the Magic Rating is greater than or equal to 1, the item is magical, and if the rating is less than or equal to -1, the item is cursed. Either way, when the item description is given in the game, if the Magic Rating is a value other than 0, it will be shown after the item type (i.e., Dagger +2). There are five levels of Craftsmanship as shown in the table below. When an item's description is given in the game, its craftsmanship is usually shown before the item type (i.e., Fine Dagger), unless the craftsmanship level is considered normal, in which case only the item type will be shown (i.e., Dagger). | ||||||||||||||||||||||||||||||||||||||||||||||||||||||||||||||||||||||||||||||||||||||||||||||||||||||||||||||||||||||||||||||||||||||||||||||||||||||||||||||||||||||||||||||||||||||||||||||||||||||||||||||||||||||||
| ||||||||||||||||||||||||||||||||||||||||||||||||||||||||||||||||||||||||||||||||||||||||||||||||||||||||||||||||||||||||||||||||||||||||||||||||||||||||||||||||||||||||||||||||||||||||||||||||||||||||||||||||||||||||
|
Using the above information, a Fine Shortsword +2 would increase the PC's Offense Rating by 8 points (5 + 1 + 2), but a Crude Dagger +1 would increase the Offense Rating by the default of 1 (1 2 + 1 equals 0, which is less than 1). | ||||||||||||||||||||||||||||||||||||||||||||||||||||||||||||||||||||||||||||||||||||||||||||||||||||||||||||||||||||||||||||||||||||||||||||||||||||||||||||||||||||||||||||||||||||||||||||||||||||||||||||||||||||||||
| Appendix C: Magic Items | ||||||||||||||||||||||||||||||||||||||||||||||||||||||||||||||||||||||||||||||||||||||||||||||||||||||||||||||||||||||||||||||||||||||||||||||||||||||||||||||||||||||||||||||||||||||||||||||||
Each magic item has four primary elements that dictate its overall functionality; the item type, the base effect, the target, and the duration. All magic items are listed below and are categorized by type: Potion, Scroll, or Ring. Items may affect the PC, nearest monster, or other items in the PC's inventory. For those items that do not have a timed duration, the effect is instantaneous and permanent. NOTE: All timed durations are approximate, as they are not based on timers, but on game loop ticks. If, for some reason, the frame rate of the game drops, the durations will be extended. This ensures the same relative durations across different-speed phones, as well as any in-game slowdowns on any one phone. | ||||||||||||||||||||||||||||||||||||||||||||||||||||||||||||||||||||||||||||||||||||||||||||||||||||||||||||||||||||||||||||||||||||||||||||||||||||||||||||||||||||||||||||||||||||||||||||||||
| ||||||||||||||||||||||||||||||||||||||||||||||||||||||||||||||||||||||||||||||||||||||||||||||||||||||||||||||||||||||||||||||||||||||||||||||||||||||||||||||||||||||||||||||||||||||||||||||||
| ||||||||||||||||||||||||||||||||||||||||||||||||||||||||||||||||||||||||||||||||||||||||||||||||||||||||||||||||||||||||||||||||||||||||||||||||||||||||||||||||||||||||||||||||||||||||||||||||
| ||||||||||||||||||||||||||||||||||||||||||||||||||||||||||||||||||||||||||||||||||||||||||||||||||||||||||||||||||||||||||||||||||||||||||||||||||||||||||||||||||||||||||||||||||||||||||||||||
| Appendix D: Random Character Names | |||||||||||||||||||||||||||||||||||||||||||||||
| During character generation, the player has the option of entering a character name using the device keypad or randomly generating a name from a pre-defined list of names. There are three different lists of character names, one for each type of character; warrior, rogue and wizard. The available names are listed below by character type. | |||||||||||||||||||||||||||||||||||||||||||||||
| |||||||||||||||||||||||||||||||||||||||||||||||
| |||||||||||||||||||||||||||||||||||||||||||||||
|
| ||||||||||
